 播面
播面 如何在 Nginx 中屏蔽特定的 IP 地址、IP 网段或特定的 User-Agent?
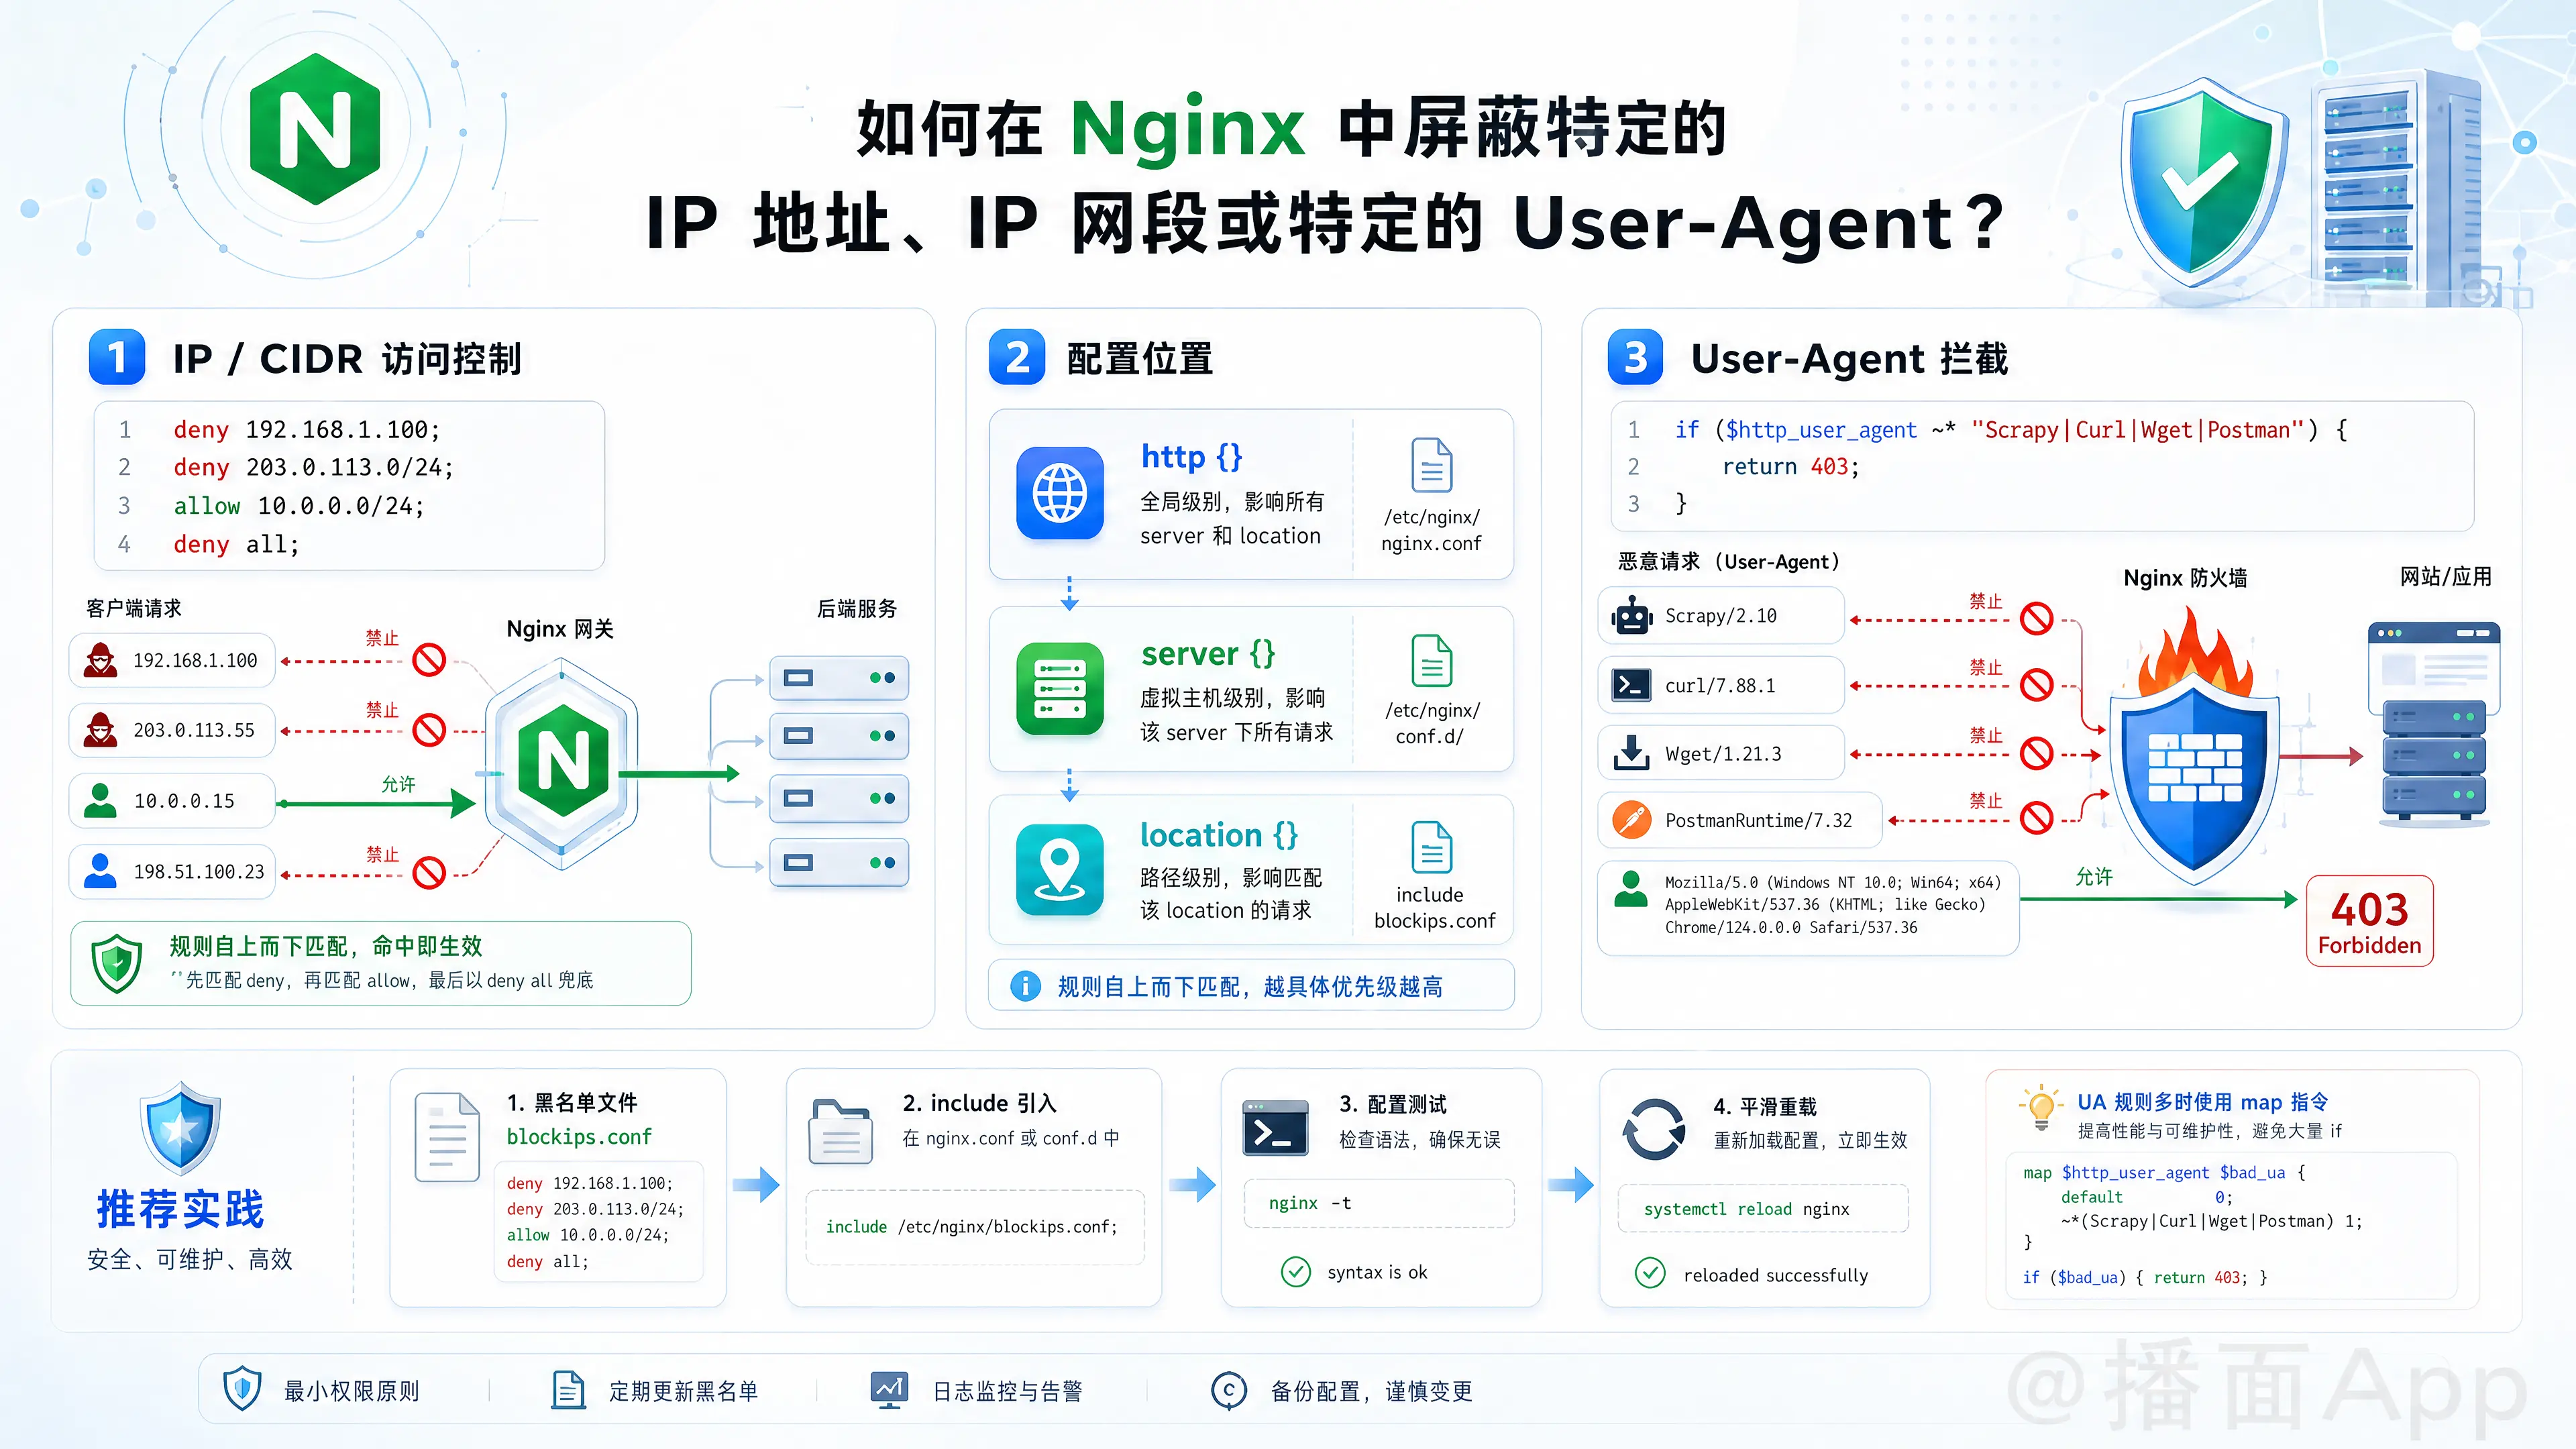
在 Nginx 中屏蔽特定的 IP 地址、IP 网段或 User-Agent 是非常常见的安全防护手段。你可以通过修改 Nginx 的配置文件(通常位于 /etc/nginx/nginx.conf 或 /etc/nginx/conf.d/ 目录下)来实现。
以下是具体的实现方法:
一、 屏蔽特定 IP 地址或 IP 网段
Nginx 使用内置的 ngx_http_access_module 模块来控制 IP 访问。主要使用 deny 和 allow 指令。
这些指令可以放在 http {}(全局)、server {}(特定域名)或 location {}(特定路径)块中。
1. 屏蔽单个 IP
server {
    listen 80;
    server_name example.com;

    # 屏蔽特定 IP
    deny 192.168.1.100;
    deny 203.0.113.50;

    location / {
        # ... 其他配置 ...
    }
}
2. 屏蔽 IP 网段 (CIDR 格式)
server {
    # 屏蔽整个 192.168.1.x 网段
    deny 192.168.1.0/24;
    # 屏蔽 10.0.0.x - 10.0.255.x 网段
    deny 10.0.0.0/8;
}
3. 仅允许特定 IP 访问(白名单模式)
注意: Nginx 是按顺序自上而下匹配的,匹配到第一条规则就会停止。如果是做白名单,必须把 allow 写在前面,最后加上 deny all;。
location /admin {
    allow 192.168.1.100; # 允许的 IP
    allow 10.0.0.0/24;   # 允许的网段
    deny all;            # 拒绝其他所有 IP
}
4. 推荐做法:使用外部文件管理黑名单
如果黑名单 IP 很多,全写在主配置里会很乱。你可以创建一个单独的文件,例如 /etc/nginx/blockips.conf:
blockips.conf 内容:
deny 192.168.1.100;
deny 203.0.113.0/24;
在 Nginx 主配置中引入:
server {
    include /etc/nginx/blockips.conf; # 引入黑名单文件

    # ... 其他配置 ...
}
二、 屏蔽特定的 User-Agent (UA)
屏蔽 User-Agent 通常用于拦截恶意爬虫、扫描器或特定工具(如 curl, wget, 某些压测工具等)。可以通过判断内置变量 $http_user_agent 来实现。
1. 基本方法:使用 if 指令
通常放在 server {} 或 location {} 块中。
server {
    listen 80;
    server_name example.com;

    # ~* 表示不区分大小写的正则表达式匹配
    if ($http_user_agent ~* "Scrapy|Curl|HttpClient|Wget|Postman") {
        return 403; # 返回 403 Forbidden
    }

    # 屏蔽特定的恶意机器人
    if ($http_user_agent ~* "SemrushBot|AhrefsBot|MJ12bot|YandexBot") {
        return 403;
    }
}
2. 高阶推荐做法:使用 map 指令 (适用于 UA 很多的情况)
如果需要屏蔽的 User-Agent 数量庞大,使用多个 if 会影响 Nginx 性能。推荐在 http {} 块中使用 map 指令。
在 http {} 块中定义 map:
http {
    # ... 其他配置 ...

    map $http_user_agent $bad_client {
        default         0;               # 默认值为 0 (正常)
        ~*Scrapy        1;               # 匹配到 Scrapy 标记为 1
        ~*Wget          1;
        ~*Curl          1;
        ~*Python-urllib 1;
        ~*SemrushBot    1;
        ~*AhrefsBot     1;
    }

    # ... server 块等 ...
}
在 server {} 块中调用:
server {
    listen 80;
    server_name example.com;

    # 如果是 bad_client (值为 1),则拒绝访问
    if ($bad_client) {
        return 403;
    }

    location / {
        # ...
    }
}
三、 测试并应用配置
无论你修改了 IP 还是 User-Agent 配置,保存文件后,必须按以下步骤操作:
测试配置文件是否有语法错误:
bashsudo nginx -t如果输出显示
syntax is ok和test is successful,则可以继续。重新加载 Nginx 使配置生效(不中断现有连接):
bashsudo nginx -s reload # 或者 sudo systemctl reload nginx